Create MySQL Database on Google Cloud
In the left side menu of your Google Cloud project, look for the SQL option located in the Databases section as shown in the image.
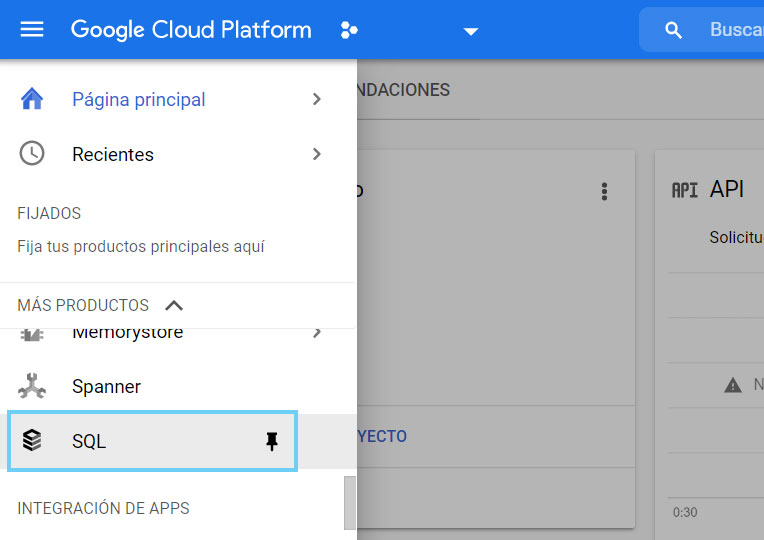
Select this option and create a MySQL DB instance.
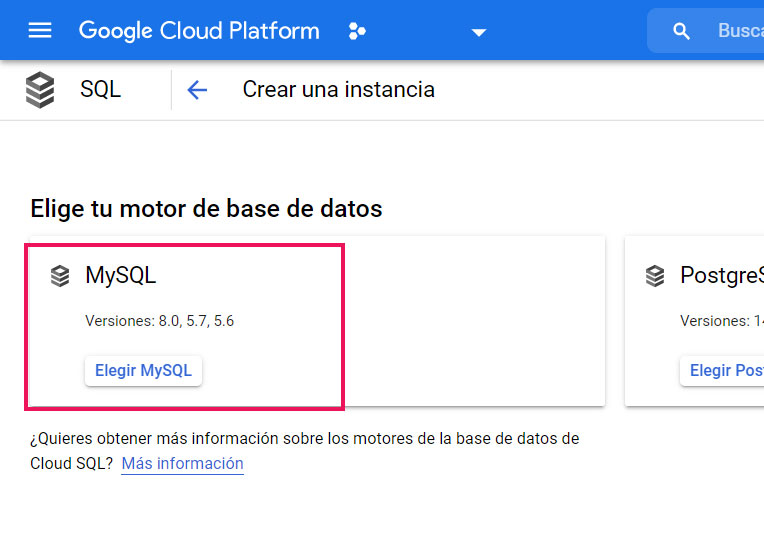
Next we are going to configure the MySQL instance that we have created.
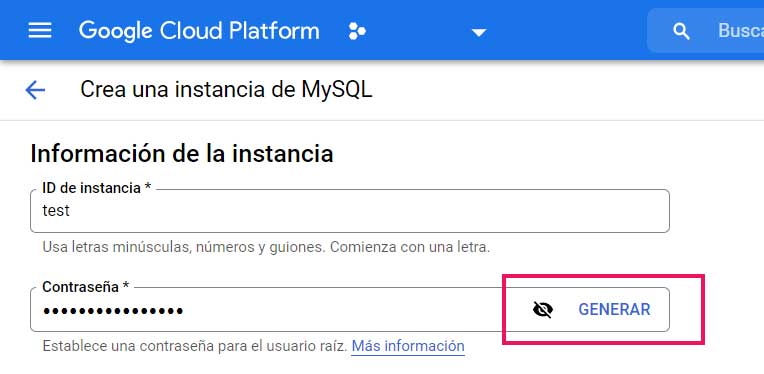
Instance Information
In this section you must fill in the Instance ID and Password fields, I recommend that you must generate the password and keep it in a safe place to prevent vulnerabilities.
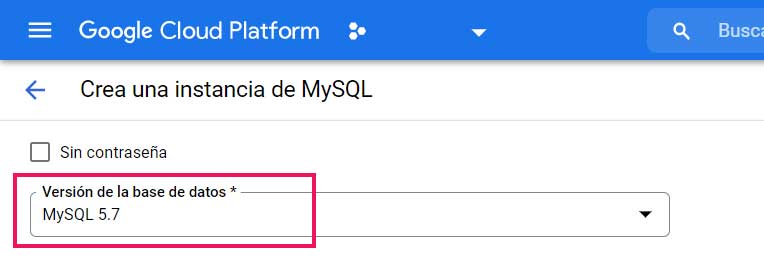
In the Database Version field, we are going to select MySQL 5.7, which is the default option.
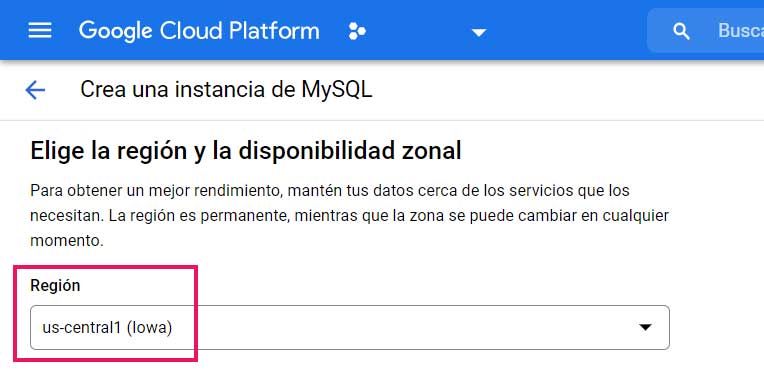
Region and Zonal Availability
In the Region field we select the option us-central1 (lowa), you can select another region depending on where your application is focused.
For example, if your users are from Latin America, you can select southamerica-east1 or southamerica-west1 to reduce request latency and improve your application load time.
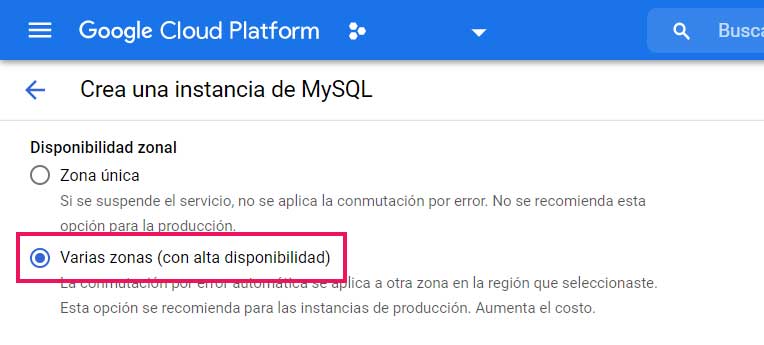
On the other hand, in Zonal Availability we select the Multiple Zones option, this will keep your application online if one of them fails or fails due to an error.
Instance Customization
This section is the most important in the configuration, since it is hidden by the SHOW CONFIGURATION OPTIONS button and it is where you are going to configure the power of your database, which translates into cost of the instance.

Select the option and let's continue with the machine configuration.
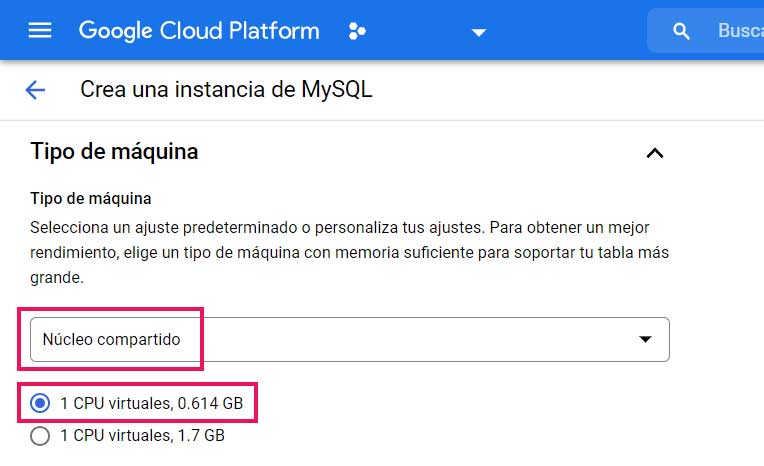
Machine Type
By default this option is marked as High Memory, which is ideal for a website with millions of requests, in this case, we are going to change it for a Shared Core machine with 1 Virtual CPU and 0.614 GB of ram memory, ideal for testing or for a small applications.
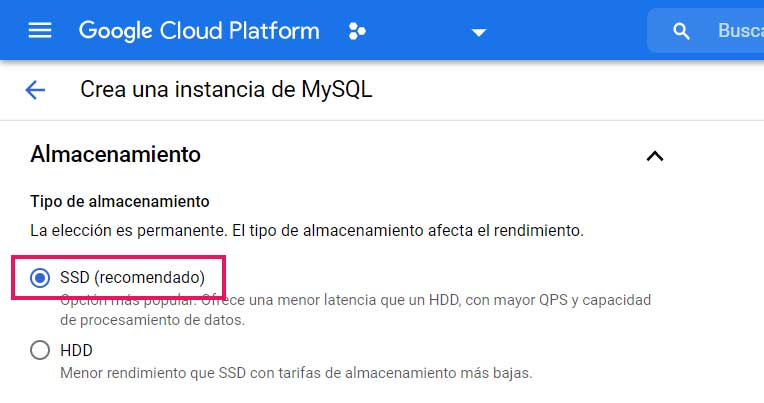
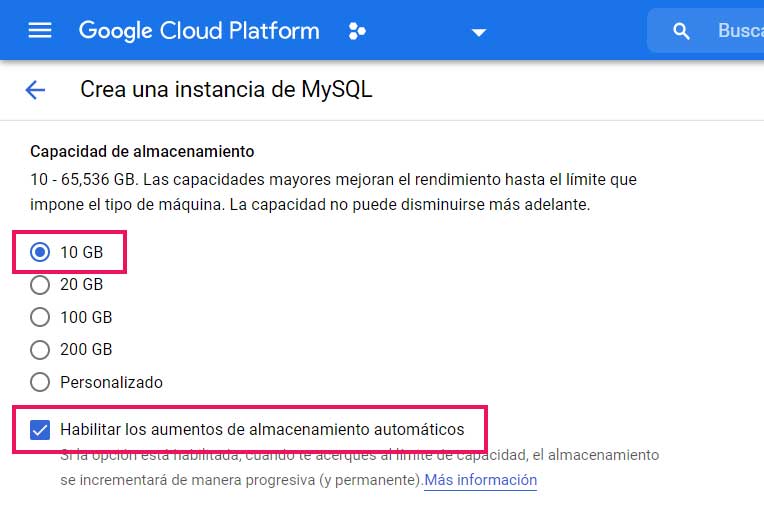
Storage
In Storage Type we are going to choose the Solid State Disk (SSD), which is faster than HDD and will increase the performance of your application.
In Storage Capacity we are going to choose 10 GB with the option marked Enable Automatic Storage Increases, this allows to google to increase the space of your application automatically.
For example, if your app needs more than 10 GB of space, google will automatically scale to the next level which is 20 GB without you having to modify your instance.
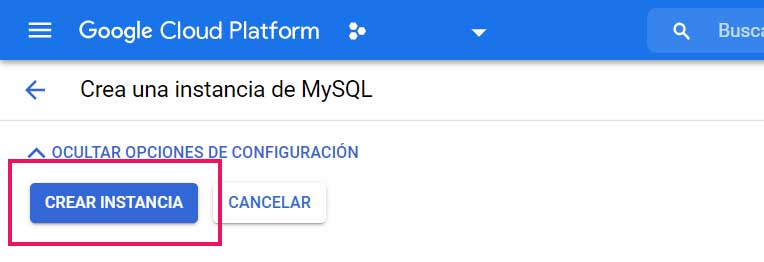
Create Instance
Once everything is configured, click on CREATE INSTANCE and you will have to wait several minutes while the instance is created.
Once completed, you will be able to see your instance in your dashboard or directly on the SQL screen, the same one that we accessed from the left side menu of your project.